Monday, January 3, 2022

Peri Peri Chicken


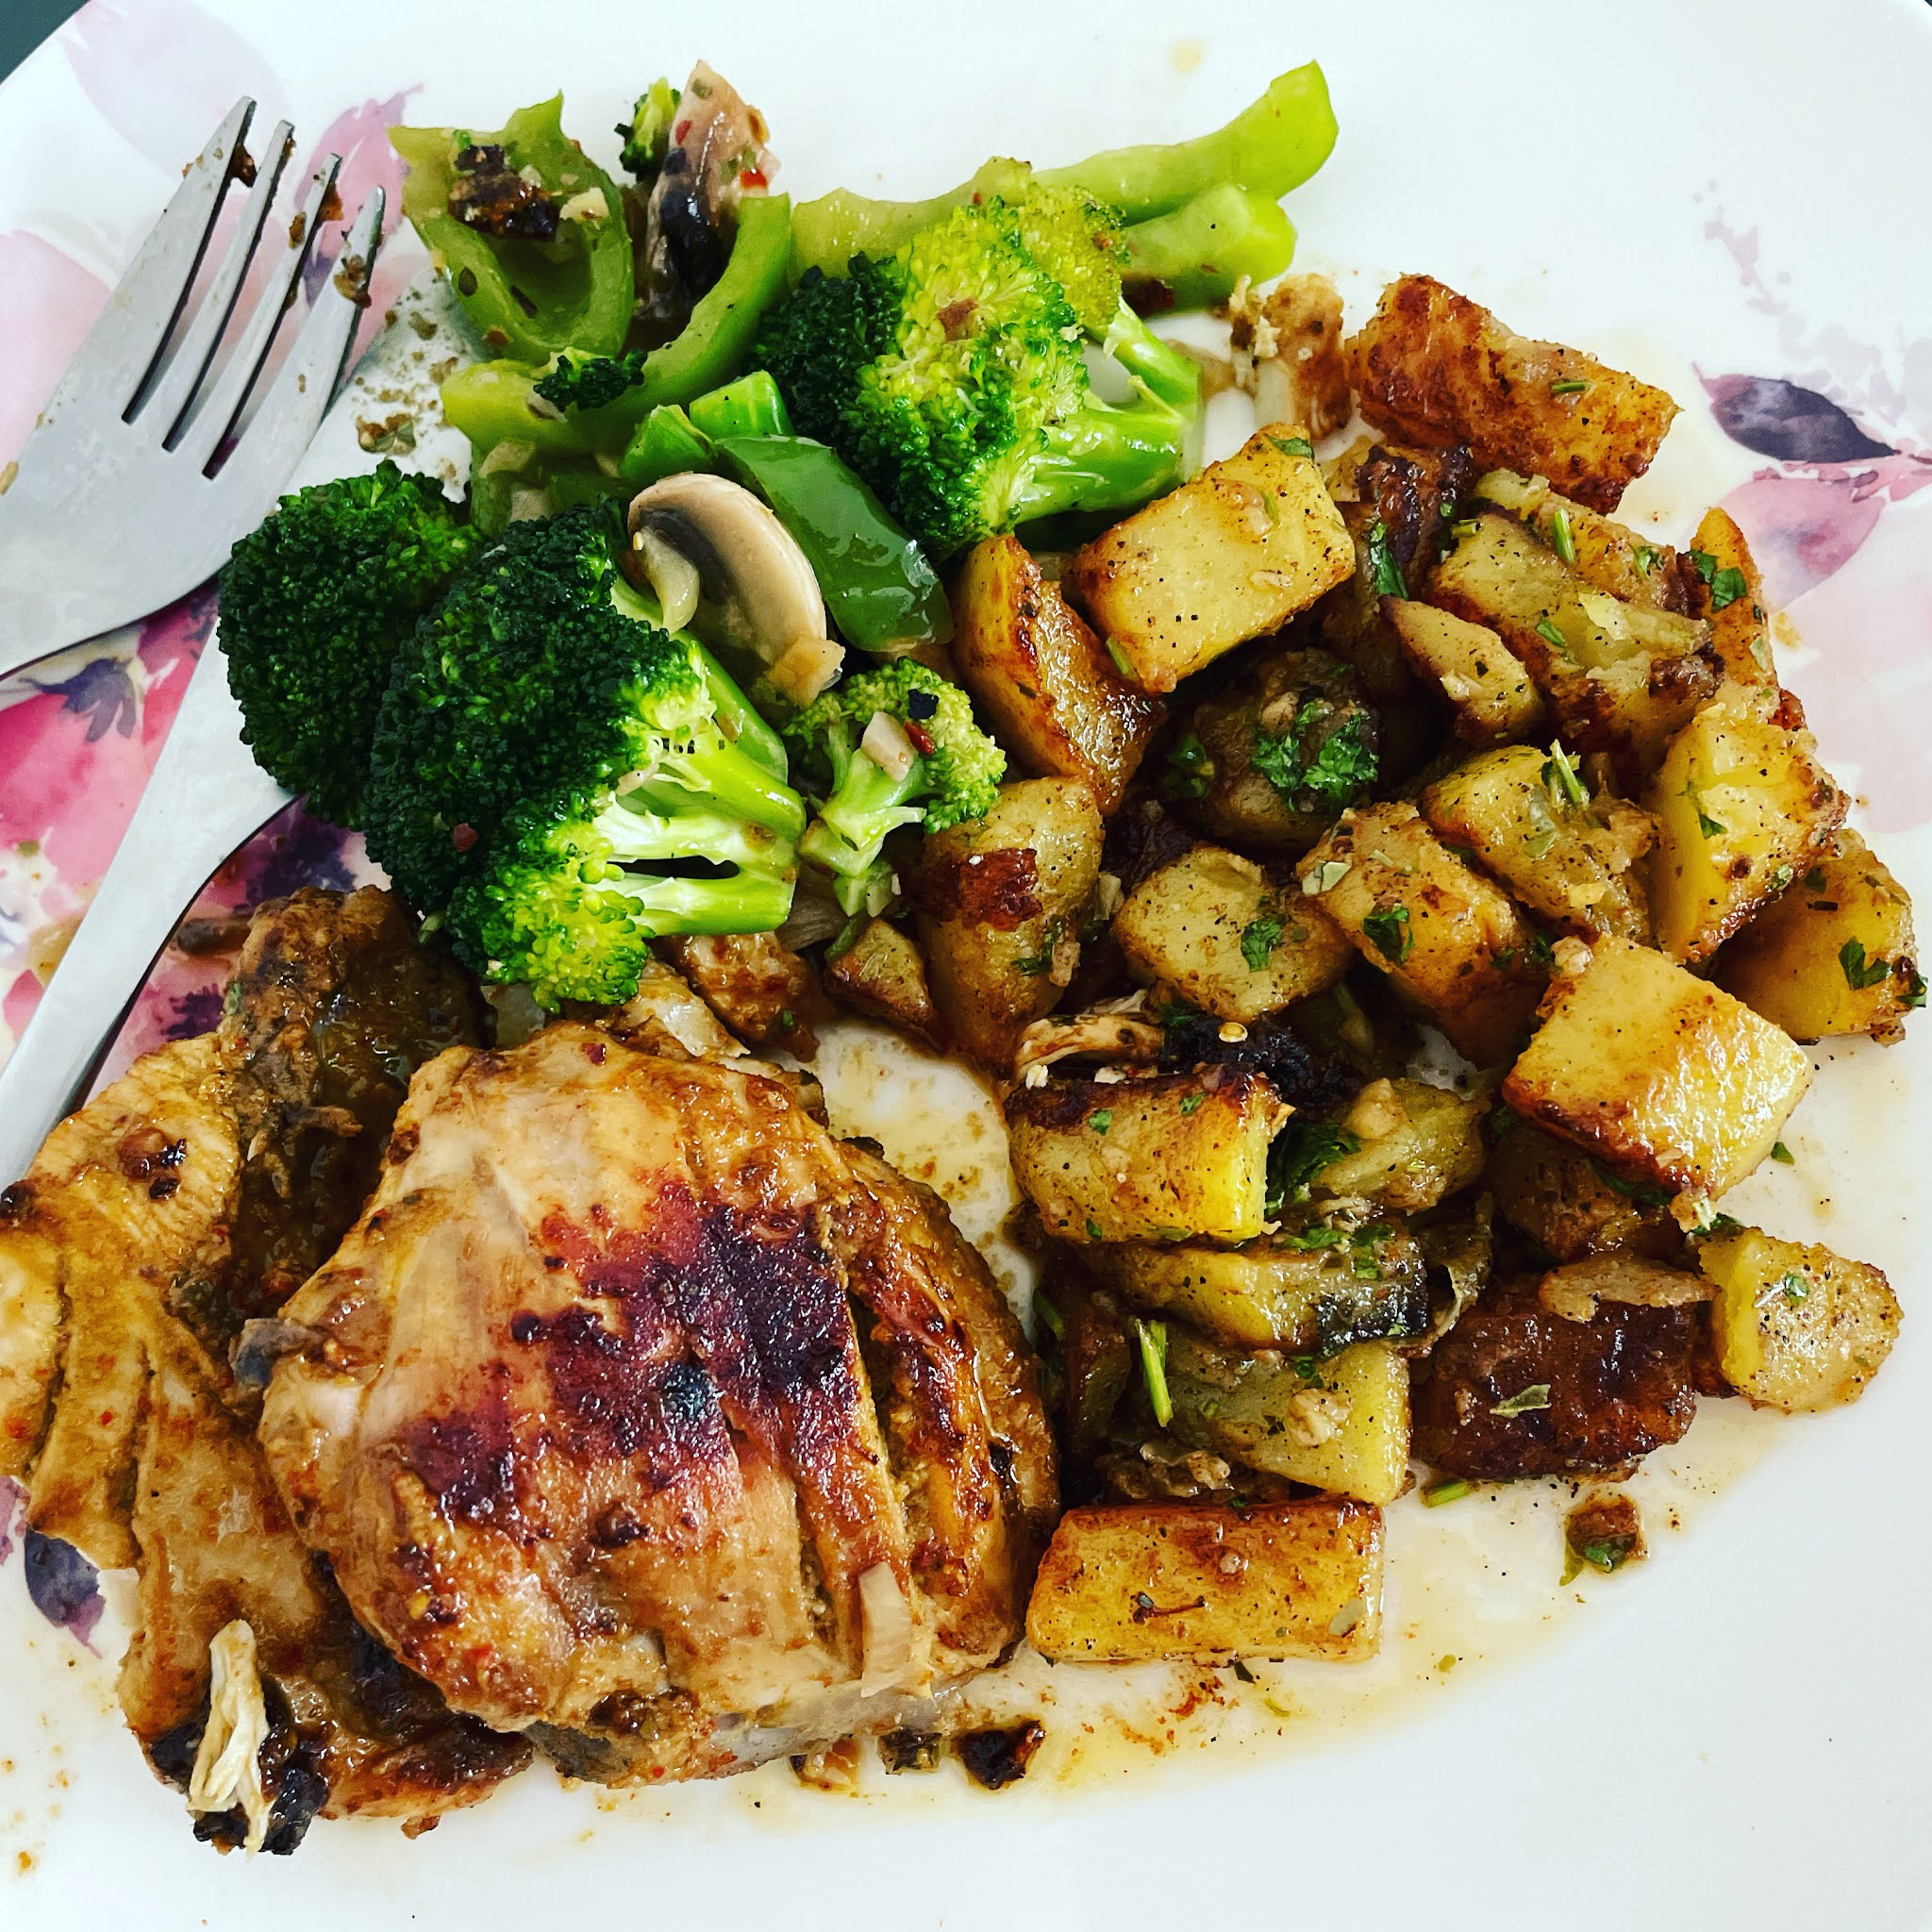
Peri Peri Chicken is one of my favorite things to eat as I have been making it for quite some time now. However when I came across this recipe from Smitten Kitchen it had an added ingredient of coriander or parsley leaves and this took it up to another level. The chicken is very tender and flavorful. We had it with some Brabant potatoes and sautéed vegetables.

Recipe Source: Smitten Kitchen 

Ingredients 

For The Marinade

3 Garlic Cloves (peeled)
1/2 Onion (roughly chopped)
1/2 of a Medium Red onion Capsicum
2 Red Chillies (I used Indian byedgi, the authentic version would be a peri peri chili) 
1/4 Cup Coriander leaves 
1 Tsp Paprika
1/2 Tsp Oregano 
2 Tbsp Lemon juice from concentrate or one full lemon 
2 Tsp Apple Cider Vinegar
1 Tbsp Olive oil
1/2 Tsp Salt or more to taste 

1 kg chicken (skinless cut into 8 pieces)
Sunflower Oil for shallow frying 

Method
1. Place all the marinade ingredients in a mixer or food processor and blend to a smooth paste.
2. Place the chicken pieces in a large bowl and marinade with 2/3 of the sauce for 1 hour or overnight in the fridge. Reserve the remaining sauce for serving with the chicken. 
3. Heat 2 Tbsp oil in a frying pan and fry the chicken pieces in batches. Alternatively you can grill it in the oven at 350 degrees F or BBQ it.
4. Serve with your favorite sides like bread, grilled vegetables, potatoes etc.

 Happy Eating!!

Churros


I love biting into a crisp hot churro with a soft center. I had  been wanted to make churros for ages but kept putting it off for one reason or the other. I finally decided to give them a shot and could not believe how easy they are. My dough didn’t look shiny or put together but when I piped the churros they came out very easily. I had to use an extra egg as my egg was on the smaller side so I’ll remember to use a large egg next time. 

Recipe Source : Brown Eyed Baker 

Ingredients 

For the Dough
6 Tbsp Unsalted Butter
1/2 Cup Milk
1/2 Cup Water
1/2 Tsp Salt
1 Cup All Purpose Flour
1 Large Egg (at room temperature)
1 Tsp Vanilla Essence

For Frying
Vegetable or Sunflower Oil
For The Cinnamon Sugar
1 Cup Castor Sugar
1 Tbsp Ground Cinnamon


Method

1. In a medium saucepan, add the butter, milk, water and salt. Bring to slight boil and add the flour. Mix well till the dough is formed. 
2. Remove the dough to the bowl of a stand mixer or a large mixing bowl and let it cool slightly. 
3. Add the egg and vanilla and beat the dough till smooth. 
4. Transfer the dough to a large piping bag fitted with large star tip. 
5. Heat the oil to 350 degrees in a large pan ( atleast two inch deep). Pipe the churros directly in the hot oil an d cutting off the end with a scissor. Fry till golden brown. 
6. Mix the sugar and cinnamon in a medium bowl and toss the cooked churros in it. 
7. Serve with chocolate sauce, Nutella or caramel. 

Happy Eating!!

Saturday, November 28, 2020

Chocolate Cupcakes with Chocolate Buttercream


Cupcakes are such a fun treat to make as they bring smiles on the faces of children and adults alike. I made these cupcakes as a thank you for my neighbor and I really liked the rich taste of the added dark chocolate coming through. The original recipe calls for vanilla frosting but I found it too sweet (I don’t like buttercream at all) and added some cocoa powder to adjust the sweetness. 

These cupcakes are delicious  and can be eaten without the frosting as well. 

Recipe - Brown Eyed Baker

Ingredients - Makes 12 Cupcakes

For the Cupcakes

85 Grams (3 ounces) Dark Chocolate (70%) finely chopped
1/3 Cup Cocoa Powder
3/4 Cup All Purpose Flour
3/4 Cup Granulated Sugar
1/2 Tsp Salt
1/2 Tsp Baking Soda
6 Tbsp Sunflower Oil
2 Eggs
2 Tsp White Vinegar 
1 Tsp Vanilla Essence 

For The Chocolate Frosting
1 Cup Unsalted Butter (at room temperature)
2 Cups Powdered Sugar
1/2 Cup Cocoa Powder
1 Tbsp Vanilla Essence
1 to 2 Tbsp Heavy Cream
A Pinch of Salt

Make The Cupcakes

1. Preheat oven to 350 Degree Fahrenheit (180 Degree Celsius). Line a 12 cup cupcake pan with liners.
2. Place the chopped chocolate and cocoa powder in a medium bowl. Pour the hot coffee over the mixture and mix well. place in the fridge for 20 minutes or completely cool.
3. In another bowl, whisk together the flour, sugar, salt and baking soda. 
4. Add the oil, eggs, vinegar and vanilla essence to the cooled chocolate mixture  and whisk till smooth.
5. Pour the batter evenly into the prepared liners. Bake for 17 to 19 minutes until the cupcakes are firm to touch.
6. Cool Completely on a wire rack and frost.

Make The Frosting

1. Whip the butter on high for 5 minutes. Reduce the speed to low and add the powdered sugar, salt and cocoa powder. 
2. Increase the speed to high and add the vanilla. Whip till fluffy for 2 minutes.
3. Add the heavy cream and mix well. 
4. Fill into piping bag and frost into desired shape. (I used a 1 M tip for the swirl).

The cupcakes can be stored in an airtight container for 3 days. 

Happy Eating!

Sunday, October 4, 2020

Sticky Buns


Sticky buns are a close cousin to the glorious cinnamon roll. While the latter will always hold a special place in my heart, the Sticky Bun is hard to beat with its gooey caramel and nut topping.

The dough is fairly simple and comes together quite easily. The original recipe calls for Bread flour but I used All Purpose Flour and got good results. I made half the recipe and got 8 small buns for Latif and I to polish off in 2 days.

Recipe SourceBrown Eyed Baker

For the Dough
1/4 Tbsp Granulated Sugar
2 1/4 Tbsp Unsalted Butter (At Room Temperature)
1/2 Tsp Salt
1 Small Egg (Slightly Beaten)
1 /2 Tsp Vanilla Essence
1 3/4 Cups All Purpose Flour
1 Tsp Instant Yeast
1/2 Cup + 1 Tbsp Whole Milk (At Room Temperature)

For the Cinnamon Sugar
3 1/4 Tbsp Granulated Sugar
3/4 Tbsp Ground Cinnamon

For The Caramel Glaze
1/2 Cup Unsalted Butter (At Room Temperature)
1/4 Cup Granulated Sugar
1/4 Cup Light Brown Sugar
1/4 Tsp Salt
1/4 Cup Light Corn Syrup
1/2 Tsp Vanilla Essence
1/4 Cup Coarsely Chopped Walnuts

Method
Prepare the Dough
1. In the bowl of an electric mixer, add the sugar, butter and salt and whip for 2 minutes on medium speed with a paddle attachment.
2. Add the egg and vanilla and beat till smooth.
3. Add the flour, yeast and milk and mix till the dough comes together. Switch to the dough hook and mix for 10 minutes till the dough is elastic and slightly tacky. Alternatively you can knead by hand if you don't have a dough hook. You can add more flour if the dough is too sticky and difficult to handle.
Lightly oil a large bowl and transfer the dough ball to it. Cover and keep in a warm place to rise until double in size (approximately 2 hours).

Prepare the Glaze
1. While the dough is rising, whip together the butter, sugars and salt with an electric mixer for 2 minutes. Add the corn syrup and vanilla. Whip till light and fluffy, around 5 minutes.

Assemble the Rolls
1. Transfer the dough to a counter lightly dusted with flour. Roll it out into a rectangle of about 9x13 inches. Sprinkle the granulated sugar and cinnamon evenly all over. Roll into a spiral from the long side. Cut into 8 equal pieces.
2. Take a 9 inch round pan and transfer the glaze to it. Sprinkle the chopped walnuts all over. Place the dough rolls cut side up in a flower pattern.
3. Cover loosely and allow to rise for  75 - 90 minutes or until double in size and touching each other.

Bake the Rolls
1. Pre heat oven to 350 degree F/ 180 degree C.
2. Bake the rolls for 35 - 40 minutes or until golden brown. If your pan is not high enough place a baking tray underneath to catch the bubbling caramel.
3. Invert the buns to a serving platter and enjoy after 20 minutes.

Happy Eating!!

Tuesday, September 15, 2020

Pistachio Shortbread


Shortbread is one of those biscuits that is so simple in its looks but super big on taste. I love it for its unapologetic buttery taste and crumbly texture. Though I had bookmarked this recipe since a long time I finally got a chance to make it this Eid. To say that it is an easy recipe is an understatement. All you need is very good quality butter and some flour and sugar. The pistachios kick it up a notch and makes it perfect for gifting.

Recipe Source - Not Quite Nigella

Ingredients

210 Grams Butter (Salted)
90 Grams Caster Sugar
230 Grams All Purpose Flour
60 Grams Rice Flour
1/4 Cup Finely Chopped Pistachios

Method
  1. Preheat the oven to 300 Degree F and line two baking trays with parchment paper.
  2. In a medium bowl, cream the butter and sugar till light and fluffy.
  3. Add the two flours and mix until just combined. Gather into a dough and divide in two halves. Place in the freezer for 10 minutes just to make it easier for rolling.
  4. Flour a rolling mat lightly and place one of the dough halves on it. Roll it out into a large rectangle (approx 1/4 inch thickness). Press the pistachios into the dough and cut into small squares or desired shape. Lift the squares gently and place on prepared tray. Repeat with the other half and place on second baking tray. 
  5. Bake for 20 minutes (do not let the biscuits brown) and remove on a cooling rack. Cool completely then store in an air tight container.
TIP - I like to roll out my biscuits between two sheets of parchment paper. This way they don't stick to the rolling pin and makes the transfer easier.

Happy Eating!!

Monday, September 7, 2020

Mom's Apple Cake from Smitten Kitchen


My love for apples is well documented on this site with my favorite Apple Pie, a Brown Sugar Apple Cheesecake, an Apple Crostata, Apple Pie Cupcakes, and lastly some Apple Shooters. This cake is another apple dessert that has joined the list of favorites and though I have made it many times I always forgot to photograph it for the blog. I finally made a smaller version and decided to post it here. Not only does it taste amazing, it is super easy to put together. The smell of cinnamon wafting through the air while its baking is an added bonus.

The original version from Smitten Kitchen makes a beautiful bundt style cake and is great for a crowd at a picnic or tea time. The quantities below are for a small loaf sized cake; perfect for two (or one apple crazy person like me).

Ingredients

For the Apples
3 medium apples
1/2 Tbsp Ground Cinnamon
2 1/2 Tbsp Granulated Sugar

For the Cake 
1 1/4 Cups + 2 Tbsp (180 grams) All purpose flour
1/2 Tbsp Baking Powder
1/2 Tsp Salt
1/2 Cup (117.5 ml) Sunflower Oil
1 Cup (200 grams) Granulated Sugar
2 Tbsp Orange Juice
1 1/4 tsp Vanilla Essence
2 Large Eggs

Method
  1. Preheat oven to 350 Degree F or 175 Degree C. Grease a small loaf pan with butter and keep aside.
  2. Peel and chop the apples in small pieces. Toss with the cinnamon and the 2 1/2 Tbsp of sugar. 
  3. In a bowl, whisk together the flour, baking powder and salt.
  4. In another bowl mix together the oil, sugar, orange juice, vanilla and eggs.
  5. Combine the wet ingredients into the dry flour mixture and mix well.
  6. Pour half the batter into the prepared loaf pan and top with half the apples. Scrape in the remaining batter and top with rest of the apples.
  7. Bake for 35 - 40 minutes till a tester comes out with crumbs attached.
  8. Cool completely before unmolding. 
Happy Eating!!

Sunday, August 23, 2020

Strawberry Pudding Shots

A simple and quick dessert recipe that tastes a bit like cheesecake and a bit like an icebox cake. You can switch it up and use chocolate rolls with coffee and nuts or any other fruit like mango, cherry etc.

Recipe - Serves 4

Ingredients

6 squares Kiri Cheese or 100 Grams Philadelphia cream cheese (at room temperature)
6 small packs or 1 large roll of Americana Swiss Rolls Vanilla Flavour (any other brand will also do)
1 Sachet Creme Caramel Powder
1/4 Cup Thick Cream (e.g. Nestle or Puck)
1 Cup Chopped Strawberries
Additional Strawberry slices for garnish

Method

1. Put the cream cheese in a big bowl and beat till fluffy (about one minute). Add the creme caramel and cream and mix well. 
2. Mix in 1 cup chopped strawberries and beat till the strawberries are blended but not pureed. 
3. Slice the Swiss rolls in smaller pieces. Take four small cups or one 6x6 glass Pyrex. Place half the sliced cake pieces at the bottom and top with half of the pudding mixture. Repeat with the cake and pudding. Garnish with sliced strawberries. 
4. Chill in the fridge for an hour before serving. 

Happy Eating!!

Wednesday, August 12, 2020

Pistachio Rabri Delight


I have a confession to make. I do not like mushy food. There. I said it. You know when you want to eat something good and you take a bite but it turns all mushy in your mouth. Ugh! Oatmeal is the biggest culprit here. Unless it is filled with nuts or mix ins I just cannot eat plain oatmeal. Same goes for desserts like Umm Ali or soggy bread pudding. So, when I wanted to make Shahi Tukda I knew that the bread had to remain crisp for me to like it. This is what I came up with: a layered version which doesn't soak the bread in sugar syrup so they remain nice and crisp. I added some condensed milk to the rabri to give it that extra sweet punch and really loved  the outcome. I would say it is heavily inspired by Shahi Tukda but it is not quite the same thing and that is why I have renamed it. 

Recipe - Serves 18-20

Ingredients
For Rabri
1 Litre Milk (Full Fat)
1/4 Cup Sugar
1/2 Cup Sweetened Condensed Milk
1 Pinch Saffron

For Bread Base
10 Slices White Bread or Milk Bread
1/2 Cup Ghee

For Garnish
Sliced Pistachio
1/2 Cup Powdered Pistachio

Method
Make the Rabri
1. Place the milk in a saucepan and bring to a boil. Reduce the flame to simmer and keep cooking the milk till it is reduced to half the quantity. Keep stirring the milk in intervals. A skin will keep forming on the top, keep moving the skin back into the milk. 
2. Once the milk is reduced, add the sugar and condensed milk. Mix well and adjust sweetness according to personal preference. Add the saffron. Turn off the heat and cool completely.

Prepare Bread Slices
1. Cut off the sides of the bread slices and cut each slice in half. 
2. Brush each slice with ghee (like spreading butter on bread). Apply ghee on both sides of the slice.
3. Heat a large frying pan and toast the bread slices on a low flame. Make sure they turn crisp but do not burn. Toast all the slices and keep aside.

Assemble the Pudding
1. Take a 9x13 baking dish or pyrex. Pour 1/3 of the prepared Rabri on the bottom. Place 10 pieces of the bread in a single layer on the rabri. Pour 1/3 of the rabri on the slices. Repeat the layers with bread and the remaining rabri. 
2. Garnish with the pistachio powder and slices.
3. Place in fridge for minimum of 4 hours. Serve chilled.

Happy Eating!

Tuesday, August 4, 2020

Brownies and Caramel Cheesecake Trifle


We had company over for Eid this time and I decided to make this dessert as I wanted something easy but eye catching. This trifle is a decadent mix of cheesecake and brownies that is easy to make and serves a crowd. This is a rich dessert so a little goes a long way. There are three different layers at play here: Brownies, Chocolate pudding and Caramel cheesecake (no bake). You can go all out and make everything from scratch (brownies, pudding and caramel) but I had to save my sanity  (on account that I was cooking Prawn Biryani, Rara mutton, Pineapple Upside Cake and Seven Layer Bars) and decided to use the packaged stuff. Either way, this turned out great and at the end of the night we had an empty trifle bowl. 

P.S: My cousins said it tasted like the Cheesecake Factory's 30th anniversary cheesecake. Hurray!

Recipe 

Ingredients
1 Pan Brownies (9x13) Cut into 2 inch cubes
200 Grams Cream Cheese
1/2 Cup Caramel
2 Cups Heavy Whipping Cream
1 Packet Instant Chocolate Pudding (e.g. Jello or Dr. Oetkers) or 2 Cups homemade chocolate pudding
2 Cups Chilled Milk (If using homemade pudding omit this)

Method
Prepare the Layers
1. Whip the heavy cream to soft peaks and keep aside.
2. Place the chocolate pudding mix in a medium bowl and add the 2 Cups milk. Whisk and prepare according to package directions.
3. Add one cup of the whipped cream and mix to combine. Keep aside till needed.
4. In a separate bowl, place the cream cheese and beat till fluffy. Add all but two tablespoons of the caramel and mix well.
5. Add the remaining whipped cream and beat till combined. 

Assemble The Trifle
1. In a trifle bowl, add half the chocolate pudding mixture and spread evenly at the bottom. Then add half the brownies. Lastly, add half the cheesecake mix and level it. Repeat all layers.
2. Finish with a drizzle of the two tablespoon caramel.
3. Place in fridge for minimum of 2 hours. Serve Chilled.

Happy Eating!

Saturday, August 1, 2020

Pistachio and Saffron Tres Leches Cake


Tres Leches means three milk in Spanish and this cake is a wonderful combination of a soft fluffy sponge with three types of milks namely whole milk, sweetened condensed milk and evaporated milk. Usually this cake is served without any added flavorings but with it exploding over Instagram during the past few months we can see a lot of different varieties like Tiramisu, Saffron, Rose etc. I decided to put my favorite flavours of Saffron and Pistachio to work here and was immensely pleased with the outcome.  The sponge recipe is from Brown Eyed Baker and its a good idea to make it in a springform pan instead of the usual 9X13 as it makes for great presentation. The cake needs ample time in the fridge to properly absorb the milks so it is best made the day before serving.

Recipe Source (Sponge recipe from Brown Eyed Baker)

Ingredients 

For the Sponge
1 1/2 Cups All Purpose Flour
2 1/4 Tsp Baking Powder
3/4 Tsp Salt
12 Tbsp (170 Grams) Unsalted Butter (At Room Temperature)
1 Cup Granulated Sugar
1 1/2 Tsp Vanilla Essence
5 Eggs (At Room Temperature)

For the Milk Mixture
2 Cups Whole Milk
1 Cup Sweetened Condensed Milk
1 Cup Evaporated Milk
1 Tsp Saffron
1/4 Cup Pistachio Powder

For the Topping
2 Cups Heavy Whipping Cream
1 Cup Pistachio Powder

Make The Sponge
1. Preheat the oven to 325 Degrees Fahrenheit. Grease a 9 inch springform pan and set aside.
2. In a medium bowl, whisk together the flour, salt, and baking powder.
3. In another bowl, beat together the butter and sugar for 8 to 10 minutes till the mixture is fluffy.
4. Add the eggs one at a time, mixing well between each addition.
5. With the mixer on low, add the flour and mix only till combined. Stir with a rubber spatula to ensure all ingredients are combined. 
6. Pour the batter in the prepared pan and bake for 40 to 50 minutes (place in the middle rack of the oven).
7. Remove from oven when a skewer comes out with crumbs and cool completely on a wire rack in the pan itself.

Prepare the Milk Mixture
1. In a heavy saucepan pour the whole milk and evaporated milk. Place on heat till it starts boiling, turn the heat to low and add the saffron and pistachio. Let the milk simmer for 10 minutes.
2. Add the condensed milk and mix well. Keep in fridge till needed.

To Assemble
1. Once the cake is cool place it on a tray to catch any leaks (do not remove the cake from the pan) and poke holes with a skewer all over the cake.
2. Slowly pour the prepared milk mixture over the cake. The milk will take time to absorb but it will absorb the whole amount.
3. Place the cake in the fridge for 3 hours minimum or overnight.

To Serve
1. Remove the cake from the springform pan (keep the bottom) and place on a serving tray. Place stris of parchment paper below the cake.
2. Beat the whipping cream till you get soft peaks. 
3. Cover the cake with the cream and using your palm place the pistachio powder on the sides. Decorate as desired. Remove the strips of parchment.
4. Serve chilled the same day.

Happy Eating.

Wednesday, June 10, 2020

Coconut Cookies


These coconut cookies are super simple to make and are very moreish. I can never stop myself from eating just one. With just two ingredients they can be made from start to finish in under an hour.

Recipe - From a friend

Ingredients
1 Can Sweetened Condensed Milk (380-395 gms)
3 Cups Desiccated Coconut
 
Method
1. Line a baking sheet with parchment paper and preheat oven to 350 degrees C.

2. In a medium saucepan, place the condensed milk and add the coconut . Mix very well to form a thick mixture. You can add flavors like cardamom powder, saffron etc at this point.

2. Let the mixture cool, grease hands with ghee or butter and form small balls. Place on a baking tray and bake for 10 minutes till golden.

3. Cool completely and store in an air tight jar. These cookies taste best within two days from baking.

Happy Eating! 

Thursday, August 17, 2017

Coconut Basbousa

 
If you live in the Middle-East you must have surely tasted or heard about the delicious Basbousa. This delicate semolina and coconut cake is amazingly easy to make and requires very few ingredients.

Recipe - From Friday magazine
Ingredients - Makes one 8X8 inch cake

For The Syrup
250 ml Water
200 Grams Sugar
1 Tsp Lemon Juice

For The Cake
100 Grams Ghee (At room temperature)
1 Tin Condensed Milk (395 Grams)
1 Tsp Baking Powder
320 Grams Semolina
100 Grams Desiccated Coconut plus extra for garnish
1 Cup Water
Nuts like Cashew or Almonds for decoration

Make the Syrup
1. Combine the sugar and water in a medium saucepan and bring to a boil. Simmer on low for 8 minutes.
2. Turn off the stove and add the lemon juice. Cool completely to room temperature.

Make the Cake
1. Preheat oven to 190 Degree Celsius/350 Degree Fahrenheit. Grease a 8x8 inch square baking tin.
2. In a bowl, mix the condensed milk and ghee. Add the semolina, baking powder, coconut and water. Mix well.
3. Pour into the prepared tin and top with desired nuts. Bake for 35 minutes or until a toothpick inserted is clean and the top is golden brown.
4. Remove from the oven and pour the cooled syrup on top. It may look like a lot but the cake will absorb everything.
5. Garnish with additional coconut, cut into squares and serve.

Happy Eating!

Thursday, January 26, 2017

Jalepeno and Cheddar Chicken Burgers


Last night I had a hankering for some burgers and when I remembered this recipe from Annie's Eats I knew I had to make it. These burgers pack a super flavourful punch and are really quick to put together. Though the original recipe serves them with Guacamole don't be deterred if you don't have any on hand or cannot find ripe avocados. These are amazing just as is with some mayonnaise and ketchup as well, or you could try them with sour cream, ranch dressing, salsa etc. I have used chicken breasts below but you can use ground chicken to make things easier. If you don't have a food processor just chop everything finely by hand and mix in a large bowl.


Recipe - From Annie's Eats

Ingredients - Makes 4 Large or 6 Medium Burgers
For the Burgers
500 Gms Chicken Breast (Boneless and skinless)
1 Jalapeno (I used pickled)
1 Medium Red Onion (Peeled and Cut in half)
1 Tsp Paprika
1 Tsp Ground Cumin
1/2 Tsp Salt
1/2 Tsp Black Pepper
Juice of 1/2 Lime
1/4 Cup Bread Crumbs
2 Garlic cloves
1/4 Cup Chopped Fresh Coriander
1/2 Cup Grated Cheddar Cheese

To Serve
Burger Buns
Lettuce
Tomato
Cucumber
Mayonnaise
Ketchup

1. Place the onion, garlic, coriander and jalapeno in a food processor. Pulse till finely chopped.
2. Add the chicken breast and process till finely ground.
3. Add the remaining ingredients and pulse till the mixture comes together.
4. Divide the mixture into 4 or 6 portions and form patties.
5. Heat 1 Tsp oil in a non stick frying pan and cook the patties, flipping once, till cooked through.
6. Toast the buns, add the patty and the toppings as desired. Serve and Enjoy.

Wednesday, January 18, 2017

Pinacolada Cheesecake Bars


Ola! These bars are one of my new favourite things to eat and I am so glad to share the recipe with you. The original recipe is from Not Quite Nigella and while she made it as a pie I chose to go the bar route for easier transportation and distribution. There are four layers here and each layer gives a different texture to the bar.


Even Jimbo Loves them (NOT!)
Though there are a lot of steps in the recipe the end result is sooo worth it. The pineapple and coconut taste really comes through and make it taste just like a pinacolada! So lets make some bars.
 

Recipe - From Not Quite Nigella

Ingredients
For the Base
375 Grams NICE coconut biscuits
105 Grams Unsalted Butter (Melted and Cooled)
For the Pineapple layer
530 Grams Tin of Pineapple in syrup
1/2 Cup Sugar
4 Tbsp Cornflour/Cornstarch
For the Cheesecake layer
375 ml Whipping Cream
375 ml UHT Coconut Cream
375 Grams Cream Cheese
6 Egg Yolks
3/4 Cup Castor Sugar
2 Teaspoon Vanilla Essence
For the Topping
100 ml Whipping cream
100 ml UHT Coconut Cream
Additional Tinned pineapple
Sweetened Shredded Coconut

Make The Base
1. Line a 9x13 Rectangular dish with foil. Grease the foil with butter. Pre Heat oven to 350 degrees Fahrenheit/180 Degree Celsius.
2. Crush the biscuits to a fine powder either in a food processor or in a bag with a rolling pin. Transfer to a bowl.
3. Add the melted butter and mix well.
4. Press the mixture on the prepared dish and bake for 10 minutes. Cool Completely.
Make The Pineapple Layer
1. Blend the pineapple with juice to get a smooth paste. Add to medium saucepan and place on medium heat.
2. Add the sugar and simmer for 5 - 10 minutes.
3. Dissolve the Cornflour in a little water and add to the pineapple. Stir quickly until thickened. Cool completely.
Make The Cheesecake Layer
1. Whip the cream to soft peaks. Keep aside.
2. In a separate large bowl beat the cream cheese till smooth. Add the sugar, eggs, coconut cream and vanilla. Whip for 2 minutes.
3.. Add the Whipped cream and beat till the mixture is smooth and voluminous.
Assemble The Bars
1. Spread the cooled pineapple mixture onto the base.
2. Slowly pour the cream mixture on top.
3. Bake for 50 - 60 minutes until the center is no longer liquid. There will be a slight wobble and it will still look liquid but it is done when the top is starting to brown. It will also firm up once it is cooling. If the top is browning too much cover it with a foil.
4. Remove from oven, place on a cooling rack to cool. Cool completely, cover with foil and place in fridge overnight.
Make The Topping and Garnish
1. The next day, whip both the creams together to soft peaks. Cut the cheesecake into required size pieces (I only cut one way and then cut the other way while serving depending on the size of the piece the person wanted).
2. Spread the cream on top, add the pineapple pieces and garnish with coconut.
3. Keep refrigerated. Serve chilled.

Happy Eating!!

Wednesday, November 23, 2016

Snickers Cake


I love snickers in any form (ice cream, cake, cheesecake or cupcakes) and this combination of peanuts, nougat and chocolate is simply perfect. Although I made the cake exactly like the recipe from Brown Eyed Baker I have given my own changes below which I will incorporate when I will make it again. Because all the four components of the cake are on a sweet note the overall taste tended to be a little too sweet for  many of the tasters though some were going gaga over the cake like little children with candy.

This cake requires some time and effort but everything is very easy to make and comes together quickly once all the components are ready. The nougat filling tastes exactly like the inside of a snickers. I was planning to make the fluff from scratch but luckily I got the fluff jar in Lulu Barsha and the filling was super easy to make.

Recipe Source: Cake and Nougat Recipe Given as is from Brown Eyed Baker with my changes in red.

Ingredients - Makes one 8 inch square or round 3 Layer cake

For the Cake
2½ Cups + 1 Tbsp All Purpose Flour
3 Cups Granulated Sugar
1 Cup + 1 Tbsp Dutch Process Cocoa Powder (I used regular cocoa powder)
1 Tbsp Baking Soda
1 1/2 Tsp Baking Powder
1 1/2 Tsp Salt
3 Eggs (Large, at room temperature)
1 1/2 Cups Buttermilk (at room temperature) (I used milk and vinegar substitute)
1 1/2 Cups Strong Black Coffee (hot)
3/4 Cups Vegetable Oil
4 1/2 Tsp Vanilla Extract (I used vanilla essence)

For the Nougat Filling
4 Tbsp (57 Grams) Unsalted Butter
1 Cup Granulated Sugar
1/4 Cup Evaporated Milk
1 1/2 Cups Marshmallow Fluff
1/4 Cup Creamy Peanut Butter
1 Tsp Vanilla Extract
1 1/2 Cups Salted Peanuts (Roughly chopped)

For the Frosting (what I plan to use when I make the cake again)
453 Grams (16oz) Full Fat Cream Cheese, Softened But Still Cool
1 1/2 Cups Powdered Sugar
1 Cup Cold Heavy Cream
1 Teaspoon Vanilla Essence

 For the Dark Chocolate Ganache
226 Grams (8 ounces) Dark Chocolate (70%) , finely chopped
1/2 Cup (4 ounces) Heavy Cream

 For the Assembly & Garnish
1 Cup Salted caramel sauce 
Chopped peanuts

Make the Cake
1. Preheat oven to 350 degrees F. Grease three 8-inch round cake pans, line the bottoms with rounds of parchment paper, grease the parchment, then flour the insides of the pans, tapping out excess; set aside.
2. In the bowl of an electric mixer (or large mixing bowl if you're using a hand mixer), sift together the flour, sugar, cocoa powder, baking soda, baking powder and salt. In a medium bowl, whisk together the eggs, buttermilk, coffee, oil and vanilla.
3. Add the wet ingredients to the dry ingredients and mix for 2 minutes on medium speed. Scrape the sides and bottom of the bowl and mix for an additional 20 seconds (the batter will be very thin).
4. Divide the batter evenly among prepared pans. Bake for 20 minutes and rotate the pans in the oven. Continue to bake until a toothpick inserted into the center of one of the cakes comes out almost clean (with a few moist crumbs), about 12 more minutes. Cool the cakes (in the pans) on wire racks for 20 minutes, then carefully turn them out onto cooling racks to cool completely.
Make the Nougat Filling
1. Melt the butter in a medium saucepan over medium heat. Add the sugar and evaporated milk, stirring until dissolved, and bring to a boil. Reduce the heat to low and cook for 5 minutes, stirring occasionally.
2.  Remove the pan from heat and add the marshmallow fluff, peanut butter, and vanilla extract, stirring until completely smooth. Fold in the peanuts. Let the nougat mixture cool to room temperature before using it in the cake. You can do this leaving it at room temperature or you can pop it into the refrigerator to speed up the process. Be sure to give a stir occasionally as it cools.
 
Make The Frosting
1. Sift the powdered sugar and add the cream cheese to the bowl of your mixer with the paddle attachment. Beat them thoroughly until fluffy and completely smooth/lump free.
2. In a separate bowl, beat the heavy cream to nearly stiff peaks, then add the whipped cream into the cheese mixture, scrape down the sides of your bowl and quickly and briefly beat to combine. Do not over beat.
 
Assemble The Cake
1. Place one layer on a cake board, and place it on a turntable. If the tops of the cakes are domed, level them.
2. Spread 1/2 of the nougat filling on the cake and top with 1/2 Cup salted caramel.
3. Repeat with second layer of cake, remaining nougat and caramel. Place the third square on top.
4. Cover the cake with the frosting and chill in the fridge till the ganache is prepared.
 
Make The Chocolate Ganache
Place the chocolate in a medium bowl; set aside. Place the cream in a small saucepan over medium heat and warm until it just comes to a boil. Pour the cream over the chopped chocolate and let sit for 2 minutes. Begin whisking the mixture in the center, gradually working your way outward until the ganache is completely smooth. Set aside to cool, whisking occasionally, until it has thickened to spreadable consistency.
 
Garnish The Cake
1. Cover the cake with the ganache, drizzle some additional salted caramel sauce over the top and side of the cake, and top with chopped peanuts. Keep the cake refrigerated, removing it from the refrigerator about 20 minutes prior to serving.
 
 Happy Eating!! 
 

Tuesday, June 28, 2016

Kheema Crêpe Parcels

 
This is the first time I ever tried making French crêpes and this fail proof recipe from Smitten Kitchen is guaranteed to turn out perfect every time. Indeed the recipe was super easy to whip up and each crêpe took just a minute on the stove. 15 minutes later I had beautiful crêpes ready for some tasty fillings. One helpful tip I got from one of the commentators was to use two non stick pans at the same time. When one side of the crêpe is done you flip it onto the second pan. This way you can cook them faster. Stack them up on a foil and when ready to eat just reheat in the oven.

 
I was inspired to make these parcels from a similar recipe made by my friend who had filled them with a chicken filling. I decided to go with kheema (spiced minced meat) and some mayonnaise.
 
I would love to try doing a sweet variation next time with nutella and strawberries or coconut and sugar. Crêpe party, here I come!

Recipe - Crêpes from Smitten Kitchen

For The Crêpes
45 Grams Unsalted Butter
1 1/4 Cup (295 ml) Milk (Room Temperature)
4 Large Eggs (Room Temperature)
1 Cup (125 Grams) All Purpose Flour
Two pinches of salt

For The Filling
750 Grams Minced Meat (Beef/Mutton)
To Marinate
2 Tbsp Ginger and Garlic Paste
2 Tbsp Yogurt
1 Tsp Turmeric Powder (Haldi)
1 Tsp Garam Masala Powder
2 Tsp Cumin Powder (Zeera)
2 Tsp Red Chili Powder
2 Tsp Coriander Seeds Powder (Dhanya)
Salt To Taste
To Cook
3 Tbsp Oil
1 Cup Finely Chopped Onion
4 Green Chillies (Finely Chopped)
1/4 Cup Finely Chopped Coriander Leaves
1.4 Cup Finely Chopped Mint Leaves

For Assembly
Mayonnaise as needed
Paste made with water and flour for sticking
 
Make The Crêpe Batter
1. Melt the butter in a medium bowl. Do not let it get too hot or it will scramble the eggs.
2. Add the remaining ingredients and stir well. There will be a lot of lumps and that is ok.
3. Cover and refrigerate for one hour or upto 4 Days.
 
Make The Filling
1. Mix all the ingredients for the marinade in a large bowl. Add the meat and mix well. Cover and refrigerate for two hours.
2. When meat is marinated, heat the oil in a large pot and add the onion and chillies. Sauté till the onion is translucent. Add the marinated meat and stir well to break down the clumps of meat.
3. Cook the meat on high till done and adjust spices according to taste. If any water is left in the pot keep cooking till it evaporates.
4. Turn off the flame and add the coriander and mint leaves. Cool Completely before using as filling.
 
Make The Crêpes
1. Remove the batter from the fridge and give it a quick stir. If you think it is a bit thick add a splash of milk.
2. Place a 8-9 inch non stick pan/skillet on medium flame. I like to use two pans on two burners to speed the process.
3. Lightly butter pan with a tissue and pour in 1/4 cup batter. Quickly rotate the pan to spread the batter evenly all around.
4. Once the edges have set, using a non stick turner or your fingers gently flip the crêpe. I flip mine onto to the second pan and continue to pour more batter on the first pan. Repeat to make more.
5. When the bottom is slightly golden remove crêpe onto a foil or wax paper. Cool Completely.
 
Assemble The Parcels
1. Place one crêpe on a plate and add 1/4 Cup of kheema in the center with 1 Tsp Mayonnaise.
2. Fold the two sides on the filling and then fold the bottom side upwards Apply the paste of flour and water to the top side and gently fold it downwards to make a square parcel.
3. Heat a skillet and place the prepared parcels on it. Cook till light golden on both sides.
3. Serve hot with Ketchup.
 
Happy Eating!!


Monday, June 13, 2016

An Iftaar Treat - Chicken Bread Rolls

 
Ramadan Kareem to all of you. The month of fasting is here once again and I have a new recipe to share. This recipe is very easy and comes together in a pinch. A good thing about these is that they are not deep fried. A quick toasting on the pan gives them a crispy exterior.

Recipe
Ingredients
For The Stuffing
200 Grams Boneless Chicken - Boiled and shredded
150 Grams Potato - Boiled and mashed
1/2 Cup Finely Chopped Onion
4 Green Chilies (Finely Chopped)
2 Tsp Oil
1/4 Cup Finely Chopped Coriander
1/4 Cup Finely Chopped Mint Leaves
1/4 Cup Grated Cheddar Cheese
Salt To taste
1/2 Tsp Pepper

For The Roll
10 Bread Slices (Use white bread for best results)
10 Tsp Mayonnaise
2 Tbsp Water
4 Tsp Ghee for frying

Make The Stuffing
1. Heat the oil in a pan and Saute the onions and green chillies till the onions are translucent.
2. Mix all the stuffing ingredients in a medium bowl. Taste and add more seasoning if needed.

Prep the Bread
1. Cut the sides off the bread slices (save them for breadcrumbs).
2. Place each slice on a flat surface and roll it flat with the help of a rolling pin. We want to get it as flat as possible as this helps in easy rolling.

Make the Rolls
1. Take one slice and place two tablespoons of filling in the center. Add 1 Tsp mayonnaise across the top. Wet the bottom edge of the bread with a little water and start rolling the bread from the top edge. Seal well and repeat with all slices.
2. Heat the ghee in a frying pan and place the rolls in the pan. Keep turning gently till all the sides are well toasted.
3. Serve hot with Ketchup.

Happy Eating!!