Monday, January 18, 2010

Spicy Mutton Curry


When my in laws were here I had made this spicy mutton dish that Ammi liked a lot. It does not have too much of gravy but is not very dry either making it a perfect compliment for rice or roti. The lime gives it a nice tanginess and the red pepper powder makes it fiery. I just threw in whatever masalas I had on hand and cooked it in the easiest possible manner. I didn’t expect it to turn out so good and was very happy with the results. All of us enjoyed this with hot rotis.
The best part about this is that there is no grinding of masalas and you don’t need any pre made stuff as well. It is simple enough for new cooks to try but very tasty that it can be served to guests as well.
I had made this again last night and added a bit too much red chili powder (uh oh). Latif kept on eating it and after some time looked up and asked “Are you testing my limit?” (hehehe) “Is it too spicy for you?” I asked (worried look on my face), “No, I like it.” Yay!!

Recipe - An Everybunny Loves Food Original

Ingredients

½ Kg Mutton (medium pieces with bones)
For the Marinade:
4 Tbsp Red Chili Powder (Kashmiri Chili Powder)
1 Tsp Turmeric Powder
1 Tbsp Coriander Powder
1 Tsp Garam Masala Powder
2 Tbsp Ginger Garlic Paste
4 Tbsp Lemon Concentrate
1 Tsp Fennel Seeds Powder
½ Tsp Pepper Powder
Salt To Taste
For The Gravy:
¼ Cup Oil
2 Onions (Large – Peeled And Sliced)
1 Tomatoes (Medium – Sliced)
1 Potato (Large – Boiled And Quartered)
For Garnish:
Coriander Leaves
Mint Leaves

Wash and pat dry the meat. In a large bowl mix all the ingredients for the marinade. Coat the meat evenly in this, cover and keep aside for an hour.
Heat the oil in a pressure cooker (or any big dish), add the sliced onions and fry till golden. Add the tomatoes and cook till they are soft. Add the meat and one cup of water for it to cook. Close the lid with the whistle. Good quality mutton usually cooks in two whistles. You may have to cook it according to the meat and the quantity used. Once the meat is cooked, open the cooker and add the boiled potatoes, coriander leaves and mint leaves. Taste and adjust seasonings accordingly.

Happy Eating!!

Sunday, January 17, 2010

A Lazy Weekend Breakfast - Spicy Egg Toast


My travel date is coming nearer (yayayaya!!) and we had planned to finish all our shopping this weekend. The plan was to wake up early and head off after breakfast. However we never woke up early and eventually never went out till eight in the night!! I didn’t want to make any traditional breakfast stuff and also wanted to use up the bread we had at home. Neither did I want to make an omelette or my fav Peanut Butter and Jelly sandwich. That’s when I remembered my cousin telling me about a spicy bread toast made with eggs and bread. They usually make this back home in India as they are not big fans of the sweet French Toast. I didn’t know the exact recipe so made my own version. It turned out to be delicious and filling, a great twist on the usual omelette. Perfect for a lazy weekend.

Recipe

Ingredients

6 Slices Bread
3 Eggs
1/4 Cup Cream Cheese
1/4 Cup Milk
3 Green Chilies
1/2 Onion
1 Tsp Ginger Garlic Paste
1/2 Tsp Turmeric Powder
1 Tsp Pepper
1/2 Tsp Salt
Butter for frying

Place all the ingredients except the eggs, bread and butter in a blender and blend to a smooth paste. Add the eggs to the blender and beat till evenly mixed with the paste. Taste and adjust seasonings according to taste. Pour into a wide bottomed bowl. Cut each bread slice diagonally. Place a frying pan on low and melt one tsp butter. Dip the bread in the egg mix and fry, turning on both sides till golden brown. Repeat with the butter and bread till all slices are used up. If any egg mix remains use more bread slices to finish it up.

Happy Eating!!

Thursday, January 14, 2010

Baked Pasta


I don’t know what to call this dish so I'll just call it Baked Pasta, OK? Right, so now that that is clear let me tell you that I absolutely LOVE pasta (Why is it that everything fattening in the world is my best friend?). Anyways, I am a big fan of pasta and unfortunately Latif is not. So, I never make it at home coz I cannot go through all the effort for one person. But last night I was not in the mood to cook any roti or rice so thought of making pasta. This is one of my favorite versions wherein I mix vegetables, some chicken and the pasta with a nice white sauce, top it with some cheese and bake it. Usually I just eyeball the sauce ingredient quantities and make up something but this time I thought of following a recipe. I found this post on Annies Eats where Annie had done a comparison of five different types of Mac and Cheese (phew!!). The Pioneer Woman’s recipe was the winner and after making this sauce I know why. I used the quantities mentioned in the recipe and also added the egg and some mustard. Next time I will use more mustard as the flavor was not very strong this time. But I didn’t add any cheese to it coz I didn’t have any cheddar on hand. It was very yummy, creamy and I loved it. The cheese to be used with this is basically cheddar but I used mozzarella. Whatever cheese you use it is going to taste great!! (its cheese after all right?)

P.S - this picture does not have the bread crumb topping as it is the second batch. I was very hungry to wait and take pics of the first one :)

Recipe Source - Adapted from Annies Eats and The Pioneer Woman

Ingredients

4 Cups Uncooked Pasta (any cut pasta, I used Penne)
Sauce:
4 Tbsp Butter
1/4 Cup All-purpose Flour
2 1/2 Cups Milk
1 Egg
1 Tbsp Mustard or 1/2 Tsp Dry Mustard
Salt
Seasonings: (Use all or what you prefer)
Pepper
Cayenne Pepper, Paprika, Thyme
Hot Sauce
Topping:
Mozzarella Cheese/ Cheddar Cheese
1/2 Cup Bread Crumbs
2 Tbsp Butter
Mix Ins:
Mixed Vegetables*
Chicken**

Preheat the oven to 165 degrees C. Cook the pasta according to package directions until slightly firm. Drain and set aside (we want the pasta to be a little undercooked as we are going to bake it).
In a large pot, melt the butter over medium-low heat. Add the flour and cook the mixture for five minutes, whisking constantly. Pour in the milk and the mustard and whisk until smooth. Cook the mixture for five minutes until very thick keeping the heat low at all times.
Beat the egg in a small bowl. Take 1/4 cup of the warm sauce and slowly pour it into the beaten egg, whisking constantly to avoid scrambling the egg. Whisk until smooth. Pour the tempered egg mixture back into the sauce, whisking constantly. Stir until smooth. Add in salt and other seasonings. Taste and adjust seasonings according to personal preference.
Add the drained cooked pasta to the pot and mix well. Then add whatever mix ins you like with the pasta (I used shredded chicken and mixed vegetables that I had cooked sometime back and was in my freezer).
Take a baking dish (big enough for all the pasta) and butter it lightly. Put the pasta in this dish and top with the cheese. In the same pot in which the sauce was cooked (empty by now) melt the butter for the topping and add the bread crumbs. Mix it well and spread this on top of the cheese.
Cover with foil and bake for 20 minutes. Remove the foil and bake for additional 5 minutes or till the top is golden brown.
I like to eat the pasta with a dollop of mayonnaise and ketchup mixed together. Yum!! How do you eat yours?

* - I used mixed frozen vegetables. Boiled, drained and tossed with salt and pepper.
** - Take two medium chicken breasts (boneless and skinless), apply ginger garlic paste, salt and pepper and keep for an hour. Cut into 1 inch pieces. Chop one onion and sauté in a pan with a little oil. Add the chicken and cook till done.
When cooled, mix the vegetables to the chicken and run once in a choppper to get smaller pieces.

Wednesday, January 13, 2010

Chocolate Mascarpone Brownies


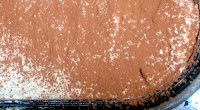
After making the Tiramisu I had some mascarpone cheese leftover and had no clue what to do with it. So I googled and came across this recipe. I love chocolate and brownies are one of my favorite treats. I was really excited to make these as I had not made brownies in a long time and luckily had all the ingredients on hand. These are supposed to be really, really rich and have a ganache topping which I skipped as I didn’t have enough chocolate. After reading all the reviews on various different blogs (same recipe) I was expecting something great. Unfortunately these did not meet my expectations and I was a bit disappointed. I think I did something wrong coz so many people said that these were the best brownies. Perhaps the ganache was the star of the show.
Luckily I had halved the recipe so don’t have to many to worry about! I froze half of them to mix and match and make some other dessert. Latif is eating the rest of them. One by one. When I am not looking.

Update - Ok, I had these today and they taste much, much better. The texture seems different , I dont know how and why. Maybe because I had eaten them when they were warm. Ofcourse I still did'nt find them amazing but am much happier now :) Do try making them with the ganache if you have any leftover mascarpone.

Tuesday, January 12, 2010

Non Alcoholic Tiramisu or Watchamacallit!!


Ok get ready to hear this….I have never had Tiramisu before!! Yikes!! I know!! Which world do I live in? Right? Wrong!! First of, I’ve lived most of my life in India wherein this dessert is simply not as popular as elsewhere. Moreover, I don’t consume any form of alcohol so the traditional tiramisu is just out of the picture. But this dessert is so popular on many of the blogs that I just had to try and make a non alcoholic version of it. So when I came across this on Dozen Flours I knew I had hit the jackpot. What can be better than non alcoholic tiramisu?? However there was a glitch with the Starbucks drink which I could not find in any of the supermarkets and also I have no idea how to make an espresso (egad!!) or even which coffee powder to buy for it (shakes head). I wrote to Julia and she gave me a lot of helpful tips which I used to make my own version. I used the traditional ladyfingers instead of the sponge cake in the recipe. This recipe is so forgiving that you can use whatever ingredients you like without the worry of raw eggs and all that. The result was a fantastic dessert (not calling it Tiramisu coz I don’t know if it tastes like it’s supposed to or even close!!) that tasted great with the right hint of the coffee flavour. What's more, this can be enjoyed by children, pregnant woman and everybody else who cannot have alcohol! Yay!

Recipe Source - Adapted from Dozen Flours

Ingredients


22 ladyfingers (Savoiardi)*
200 gms Mascarpone Cheese
1/2 Cup Powdered Sugar
2 Cups Whipping Cream
1/4 Cup Powdered Sugar
1 bottle Starbucks Double Shot** or Frappuccino Coffee Drink (mocha)
1/4 Cup Instant Coffee***
1 - 2 Tsp Unsweetened Cocoa

In a bowl, beat the cheese, ½ cup sugar and two tablespoons of the coffee till smooth. Cover with plastic wrap and refrigerate.
Whip the cream, sugar and 2 tablespoons coffee on high till peaks are formed. Take half cup of this mixture and mix it with the cheese mixture (removed from fridge). Set aside.
Pour out the Starbucks drink into a tall glass (the length of the ladyfingers) with a wide mouth or a bowl with a wide bottom. Have ready a square or rectangle glass dish that must be at least 2 inches deep.


Start dipping each biscuit in the Starbucks drink for 2 – 3 seconds and arrange in a row on the bottom of the dish. Repeat till the bottom is neatly covered with the ladyfingers. If any pieces are broken place them in the center of the dish and keep the good ones for the edges. (I dipped mine a little longer fearing that the ladyfingers would not soften up. Boy was I wrong! They were very soft. Next time I know to dip them just for 2 seconds.)


Spread half of the cheese mixture onto the ladyfingers and cover all of them evenly.


Put the whipped cream mix on the cheese layer and spread completely.
Repeat the layers with the ladyfingers, cheese layer and whipped cream layer.
Cover with a plastic wrap and place in fridge for 2 – 4 hours (I left it overnight).


Before serving, dust the top with a coat of cocoa powder. Cut into squares and serve immediately.

* - May require more depending on the size of your dish. I used a 9 X 8 rectangle.
** - The original recipe called for doubleshot but I used the frappuccino which is much lighter. For a stronger coffee taste use the double shot or strong espresso coffee.
*** - I used Nescafe decaf with milk

Happy Eating!!

Thursday, January 7, 2010

Bangalore!! Here I come!!


20 January 2010. Time - 22:55. Me on a plane. To Bangalore. To have FUN. To EAT. To SHOP till I DROP. To meet FRIENDS. To see PLACES. To take a BREAK from WORK.

With HUSBAND. HOTEL ROOM. No Cleaning, No Dishes, No Laundry. Me and Him. Him and Me.

exams :(
books .. Reading after 2 years.. Not Exciting..
Sigh!! Why do all good things come to an end?

15 Days, 6 Exams, Two cities. With some of my favorite memories. Cant Wait!!!

Tuesday, January 5, 2010

Carrot Cupcakes and a lot of rain


We had a family picnic on the 1st and I wanted to make some treats so that I could post about it and also have people to share them with. Since I had never tasted a carrot cake I decided to try it and started searching on the web for a good recipe. Of course the first place I always check for recipes is Annie’s or Michelle’s websites and lo! Annie had a recipe for Carrot Cupcakes. Lucky me…So I open my fridge and see that I have a lot of unused carrots lying there (with a lot of other unused vegetables). Armed with the recipe, I remove my food processor from the recesses of my cupboard and as I try to plug it in it just wouldn’t start! (Goodbye dear machine, you will not be missed hehehe) In her recipe Annie says to grate the carrots in the food processor and now I was in a big fix. If I grate them by hand will the recipe work? Will they be too fine and mushy? Well I marched ahead and grated them by hand and used my stand mixer for beating the eggs and sugar. I never realized that this recipe does not use butter until I scanned it ten times and saw it needed only oil. And since I LOVE nuts I threw in a couple of walnuts and omitted the cloves.
In the end they turned out very well and Latif gave them 5 out 5 stars!! They are very moist and flavorful. A perfect treat!! Oh yeah, about the rain... though the cupcakes were a success the picnic unfortunately was not ! The skies opened up and it rained cats and dogs, drenching everyone and everything to the bone. we had to run back home and forget all our barbeque plans for the night :( More on that later though.. meanwhile enjoy these yummy cupcakes.

Recipe Source: Annies Eats

Ingredients

2 ½ Cups All-purpose Flour
1 ¼ Tsp Baking Powder
1 Tsp. Baking Soda
1 ¼ tsp. Ground Cinnamon
1/2 tsp. Grated Nutmeg
1/8 tsp. Ground Cloves
1/2 Cup Walnuts (chopped) (optional)
1/2 Tsp Salt
3 Cups Grated Carrots (do not grate very finely)
1 ½ Cups Granulated Sugar
1/2 Cup Packed Light Brown Sugar
4 Large Eggs
1 ½ Cups Sunflower or Vegetable Oil

Preheat the oven to 175 degrees C and line two muffin pans with cupcake liners.
Sift the flour, baking soda, baking powder and salt in a large mixing bowl. Add the grated carrots, cinnamon, nutmeg, cloves and walnuts and stir gently to mix. Set aside. Beat the eggs and the sugars in a stand mixer* till they are fluffy. While the mixer is on, slowly pour the oil in a thin stream and continue mixing till it is well incorporated (15-20 seconds)
Pour this mix into the bowl with the flour and using a large spoon or spatula gently fold the ingredients till no streaks of dry flour remain.
Fill the cupcake liners (I use an ice cream scoop for this) and place in the oven for 20 – 25 minutes or till a toothpick inserted in the center comes out clean.

*- Before I had a stand mixer I would use a hand mixer or an egg beater and wooden spatula for making cakes.
The same recipe can be used to make a cake (in two 9 inch round pans or one 13 by 2 inch pan) just increase the baking time till cake is done.

Happy Eating!!

Sunday, January 3, 2010

Another year is over...


The year has come to an end and I look forward to a new beginning. Though this year was not very eventful it surely had its ups and downs.


He looks so adorable... Love this pic of his (yeah pls ignore the chubby lady)

Well, first we decided that we want to start a family!! Yay!! So we are trying and let’s see how that goes... (With sufficient pressure coming from all the relatives and 'well wishers' ahem...)
We moved into our new place (rented) and spend a good time decorating it to our satisfaction and are glad with the results. The gardens are pure heaven in this part of the world for someone who loves greenery. It’s so peaceful and serene at nights. I just love to take a walk in the big ground with Latif. Of course we still haven’t made use of any of the fantastic facilities there but we are still happy about the place.
On the job front things are very dicey. While I still have my job, hubby unfortunately lost his and is in a bit of a funk lately... Or maybe he is just pretending so that I give him a lot of love!! he he.. The recession did affect a lot of people much worse than it hit us and I am thankful that we are at least on better grounds than most.
And of course I managed not to lose a single kilo which I had promised myself coz I have happily managed to gain a LOT of unwanted weight :( I am planning to cut off meat and poultry from my diet for some time and focus on eating more veggies coz yesterday when I went grocery shopping I realized I just didn’t cook enough vegetarian food. There are so many vegetables available in the market and I hardly bring them home citing the same reason every time that I don’t know how to cook them. (Of course you don’t know that you dumb A**). So, I am going to buy new kinds of veggies and try to cook up good healthy stuff. Hopefully that will help me with some weight loss.
Otherwise All izz well (haha corny I know, but can't help it) and look forward to a good year of blogging. Cheers!! And yeah.. Happy Eating :-)